In a previous post, I wrote about the lack of a built-in Sensitive Information Type (SIT) for UK bank accounts in Microsoft Purview.
One New SIT, One Year On, and UK Banking still missing
While Microsoft Purview includes many built-in financial identifiers, there isn’t a dedicated SIT that detects a UK bank account using the combination of a Sort Code and Account Number. Fortunately, creating one is easy.
In this post, I’ll show you how to build a custom SIT that detects UK bank account details and how you can use it in both Purview eDiscovery and Data Loss Prevention (DLP).
What We’ll Create
We’ll create a custom Sensitive Information Type called:
UK Bank Account
This SIT will contain two supporting patterns:
- UK Sort Code
- UK Bank Account Number
Together, these 2 provide a much more reliable way of identifying UK bank account details than searching for either value individually.
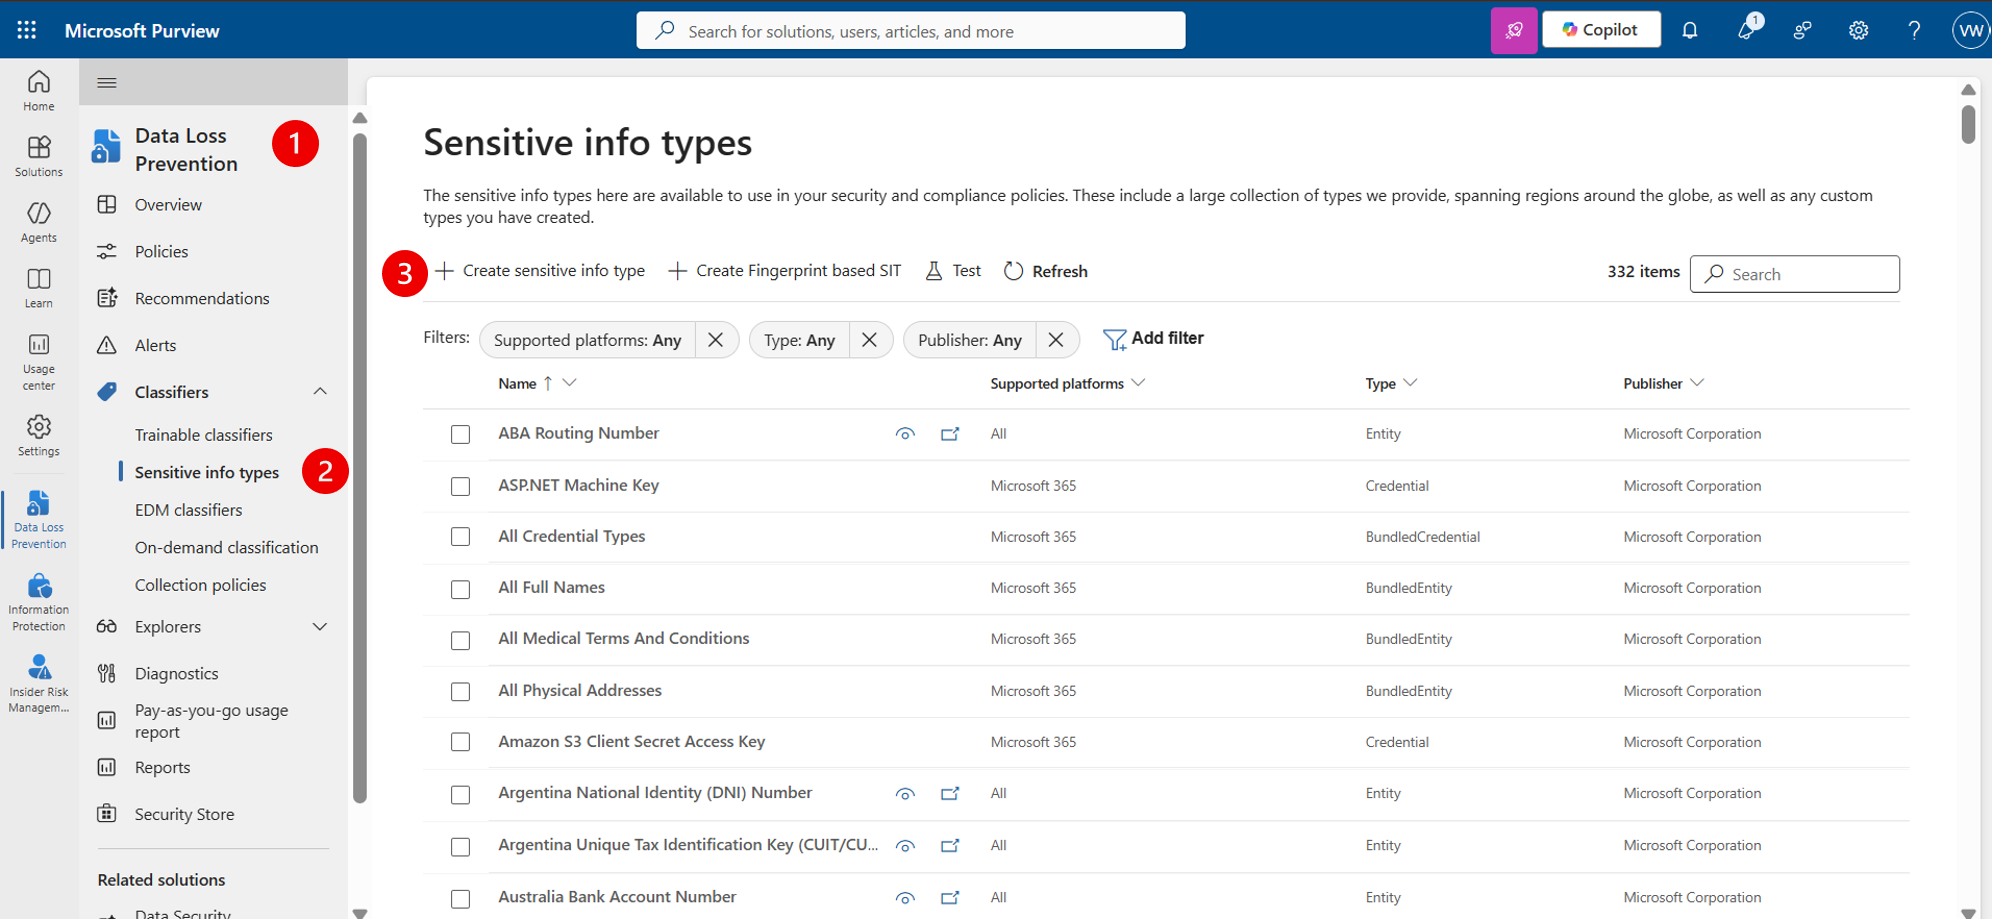
Step 1 – Open Microsoft Purview
- Navigate to the Microsoft Purview portal.
- Go to: Solution → Information Protection or Data Loss Prevention (either works) → Classifiers → Sensitive info types
- Select: Create sensitive info type
Step 2 – Create the Sensitive Information Type
Enter:
- Name: UK Bank Account
- Description: Detects UK bank account details using a UK Sort Code and UK Bank Account Number.
Continue to the pattern editor.

Step 3 – Create Regex for the UK Sort Code
A UK Sort Code is usually 6 digits and can appear in different formats:
12-34-5612 34 56123456
For the first pattern, create a regex for the UK Sort Code.
- Select Create Pattern
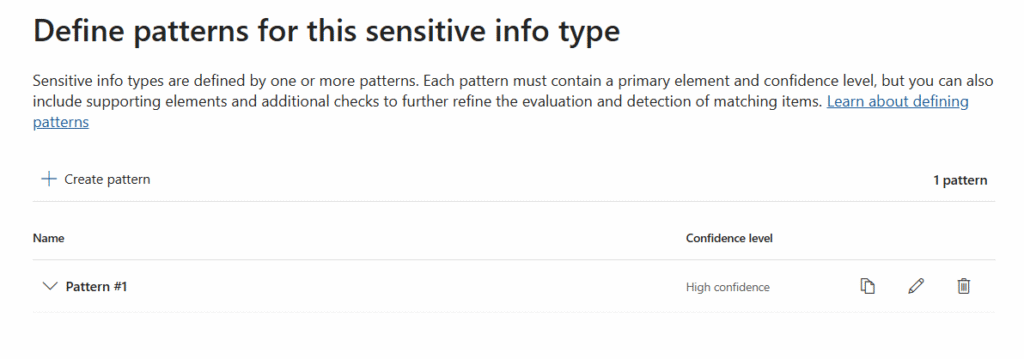
- (1) In Confidence Level → High Confidence
- (2) In the Primary elements → Regular expression

- In the ID → name it UK_Sort_Code
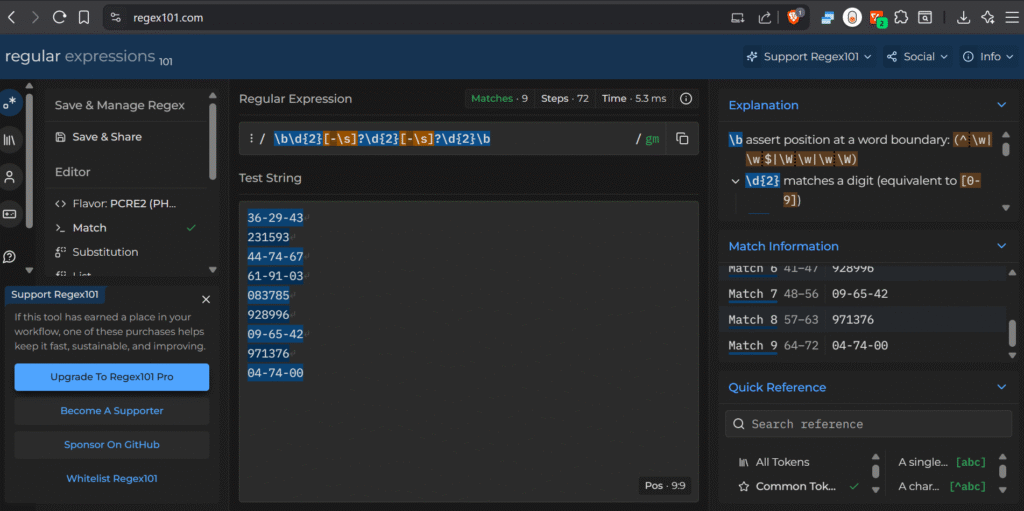
- In the Regular expression field: Use this regex:
\b\d{2}[-\s]?\d{2}[-\s]?\d{2}\bThis detects:
- 6 digits together
- 6 digits separated by hyphens
- 6 digits separated by spaces
A quick test over at regex101 confirms that this Regex works
- In Character proximity → tick the anywhere in document
- (3) In Supporting elements → select Keyword list
- in the Add a Keyword list → create the ID UK_Sort_Code_Keywords
- In the keyword group #1 → use the Case insensitive box and use the following
- Use keywords that commonly appear near a UK Sort Code:
- sort code
- sort-code
- sorting code
- bank sort code
- branch sort code
- payment sort code
- account sort code
- sortcode
- sc
- bank code
- branch code
- UK sort code
- Chose the option: “string match”. This ensures that it looks for the whole word block. Ex. “Sort code” instead of just the first word “Sort”
Step 4– Create Regex for the UK Bank Account
- Create another pattern and name it: UK Bank Account
- In the Regular expression, Use the Regex:
\b\d{8}\b
- Then add your supporting elements. UK_Bank_Account_Keywords, use the following keywords:
- Account-related keywords
- account number
- bank account number
- account no
- account no.
- acct number
- acct no
- acct no.
- bank account
- payment account
- beneficiary account
- recipient account
- payee account
- UK account number
- account details
- banking details
- payment details
- To make it stronger, Create another supporting elements, call it UK_Banks_Names. and add the names of the common High-street banks in the UK. (Use the items from 1 to 17 for the most common banks) then 18 to 148 for the more niche banks: Source: https://en.wikipedia.org/wiki/List_of_banks_in_the_United_Kingdom
- Ensure to use the option: string match.
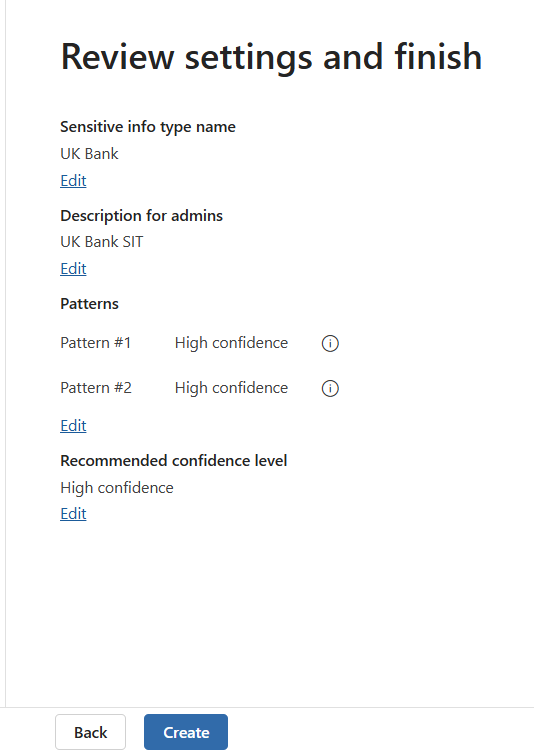
- Click Next
- In the Choose the recommended confidence level to show in compliance policies, keep it to High Confidence level.
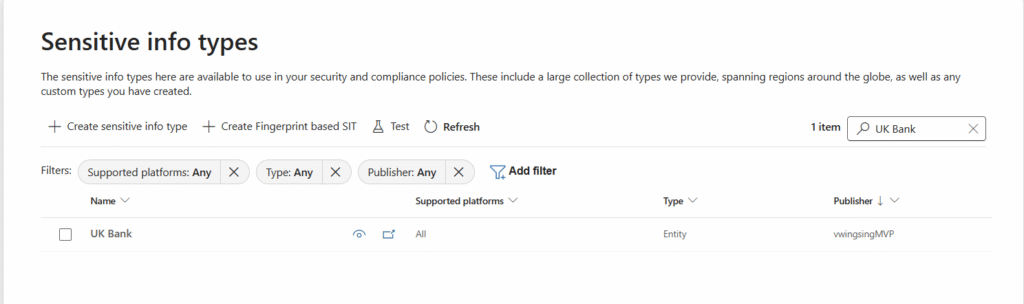
Step 5 – Testing the newly created SIT
Once you’ve created a new SIT, go back to the Sensitive Info types, open it and use the Test function
This is where you upload a copy of a file that contains the UK Bank Account info and run the test. Get Sample UK Bank Account from here: https://github.com/dlpdummytesting/Testing-FIles/blob/main/Uk%20Bank%20Account%20Number
You’ll end up with something like this:

This shows that it was able to detect the patterns inside of the document.
Reference:
Get Sample UK Bank Account from here: https://github.com/dlpdummytesting/Testing-FIles/blob/main/Uk%20Bank%20Account%20Number
Test your Regex here: https://regex101.com/