There are now 326 built-in Purview SIT (as of 07-June-2025). The new addition great but Microsoft needs to do a better job in managing how SIT’s documented and communicated to it’s users. Here’s my quick rant on this matter:
Rant 1: The Update list that is stuck in February 2024
Why it’s frustrating: We’re stuck creating custom SIT because the docs are MIA. (Although, I did win a project out of creating custom SIT – but still!)
Rant #2: Inconsistencies in SIT naming
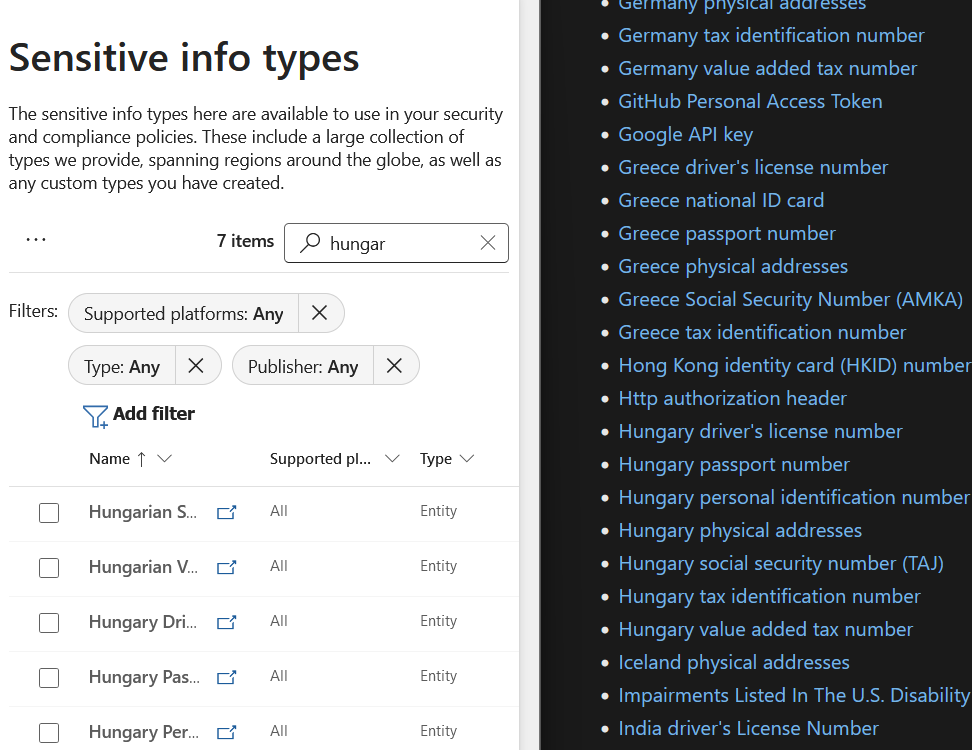
If you compare the SIT names in the In the official documentation against the SIT names that you get in the Purview portal, the names that are used shows up are different.
You can see in this image below that in the Purview Portal (left), There are items such as Hungarian Social Security number versus Hungary Social security number.
Some of the names have an added n (Australian instead of Australia), some have the words Identification spelled out instead of ID. There’s a long list of inconsistencies with the naming.
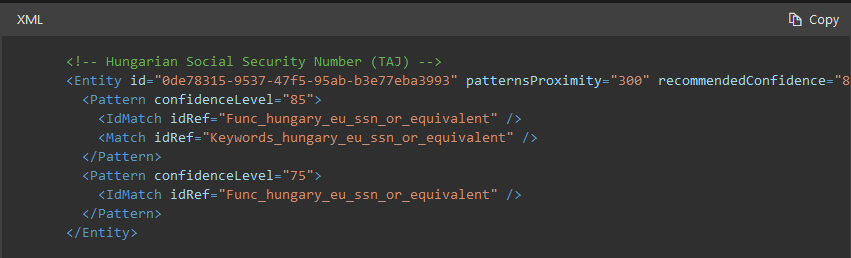
Admittedly, from within their XML data, the names are correct. So now I ask the product team, why have the names in the documentation title be different then?
Rant 3: No announcements when new Built-it SITs are out
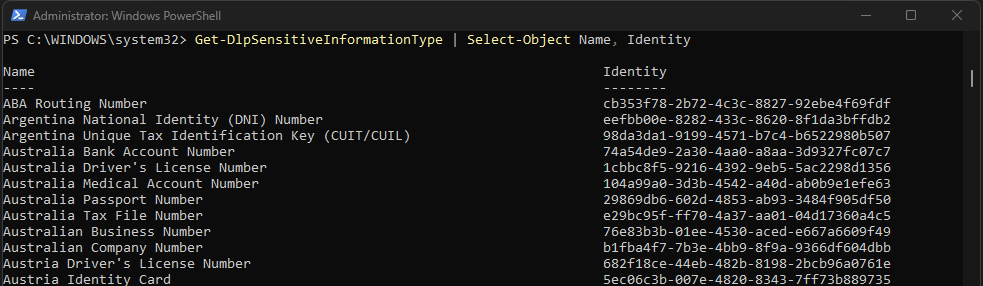
Use the Immutable IDs when deploying SITs. Use the following command to export all the ID in a csv file
Get-DlpSensitiveInformationType | Select-Object Name, Identity | Export-Csv -Path "SIT_Names_and_IDs.csv" -NoTypeInformation

Change the path name to a location where you want the file to be exported.
Using the Immutable Identity (ID) is better when deploying your Purview policies as names could easily change but these ID (as the name implies) are immutable. This makes your deployment scripts future-proof.
At first glance, it’s easy to think that if you have Data Loss Prevention (DLP) capabilities where you have policies monitoring internal data flows, then Information Barriers might be an unnecessary extra. After all, DLP diligently scans every email, document, and chat for sensitive content. This is certainly the sentiment that I often get when talking to Cyber Security teams.
This made me realise 2 things:
Microsoft needs to do a better job in marketing/ promoting Purview Information Barriers and
Information Barrier has it’s own purpose that DLP cannot do.
What is Purview Information Barrier
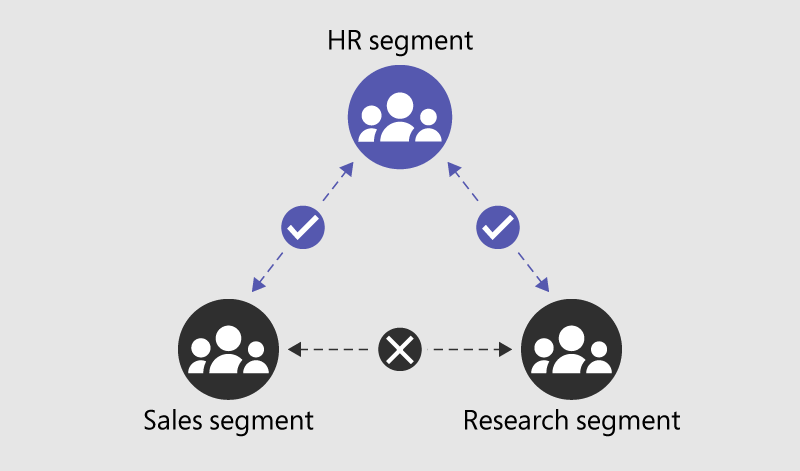
Microsoft Purview Information Barrier is designed to restrict communication and collaboration between defined groups within an organisation. It’s primary function is to ensure that teams with conflicting interests (think of trading and research groups in financial services) cannot interact with each other. By enforcing internal boundaries, these policies help maintain confidentiality and avoid accidental data leakage between sensitive departments. (ex. Insider Trading)
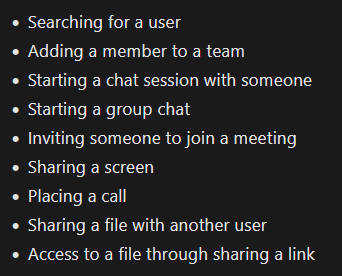
With Purview Information Barrier, you can create a policies that can automatically prevent internal teams from communicating with each other through Microsoft teams. These include the following actions:
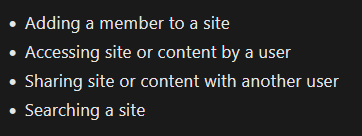
In SharePoint and OneDrive, Information Barriers can prevent the following unauthorized collaboration:
Capabilities shared by Information Barrier in Microsoft Purview DLP
You probably noticed that the activities above such as “Sharing a file with another” and “Sharing content with another user” can already be done within Microsoft Purview DLP. In essence, yes, that is correct. An admin can setup a policy to BLOCK these file sharing to another user.
Where DLP falls short and Information Barriers shine
While Purview DLP is effective at blocking explicit sending or sharing actions, it misses scenarios where access is already granted, which is where Purview Information Barriers come in to the rescue. DLP policies activate when a user actively sends data, but if sensitive information is already shared through granted permissions, the DLP policy remains dormant. For example, if User A (Finance) adds User B (Sales) as a member to the Finance Teams site or SharePoint site, User B gains immediate access to all files without any explicit sharing event, leaving DLP unable to intervene.
Alternatively, User A could simply send a meeting invite and start a Teams call with screen sharing, bypassing the trigger for DLP.
Another example, consider a situation where User A uploads a confidential document to a shared folder that automatically grants access to a broader group—here, Information Barriers would prevent unauthorised viewing by restricting access at the source, whereas DLP would not block the document being placed in that shared location.
Strategy in using BOTH Information Barrier and DLP
You should view Purview Information Barriers as a key part of your data governance and protection strategy. Relying solely on DLP leaves gaps that Information Barriers can fill—by preventing risky internal interactions before they even happen. Here’s a few actionable items that you can do today:
Start by reviewing your organisation’s internal communication flows to identify potential conflicts of interest and assign segmented rules that restrict who can communicate with whom.
Work with your Corporate Communications, Human Resources teams and Legal team to identify when and where to apply restrictions between groups of users.
Ensure these barriers align with your overall compliance and governance framework, and conduct regular testing to confirm their effectiveness. Then codify these in your data governance policies
Finally, train your teams on why these measures are necessary and how to adhere to them.
Adopting a dual strategy with both DLP and Information Barriers will provide much stronger data protection stance, reducing the chance of inadvertent data leaks from within.
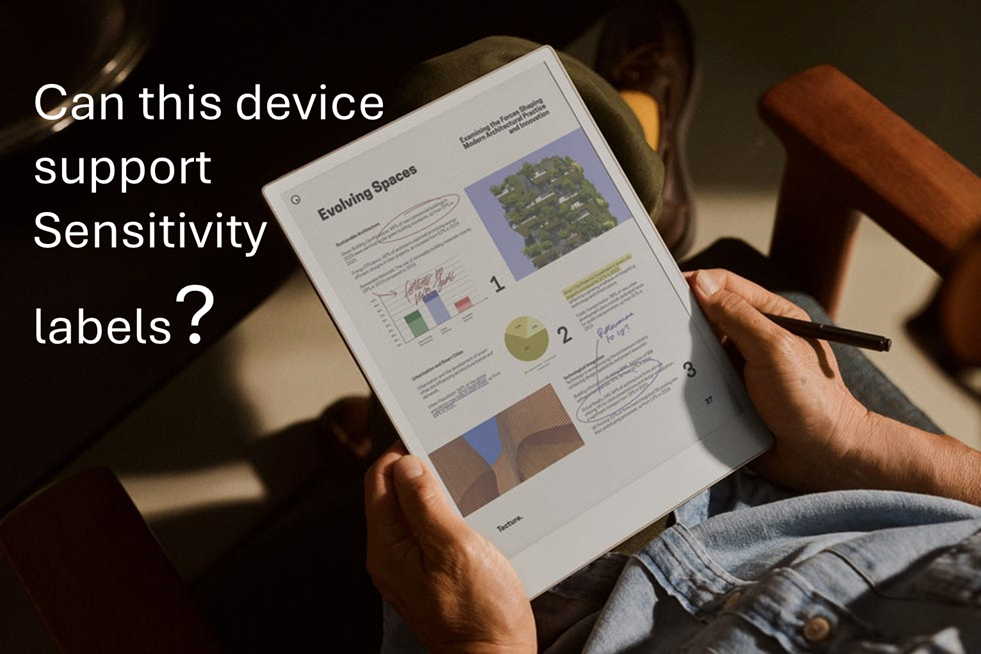
I’ve already decided what I’ll buy first when I win the lottery and it’s going to be the Remarkable Paper Pro.
I saw a C-level executive from a client using this device in a meeting and I was immediately impressed by its design. The form factor, the way it writes like paper and the feature where you can just write on-top of a PDF files is just so cool.
This same client later asked whether implementing sensitivity labelling for PDF files would impact their users as they have many of whom use this device for reading and annotating documents whilst travelling (especially VIPs). So…I decided to investigate.
Remarkable Paper Pro: Technical Overview
Operating System: Codex (custom Linux-based OS)
Supported formats: Limited to PDF and ePub
Web capabilities: No built-in browser
File Management Options
Email: Direct file sharing via email.
Cable transfer: USB connection for importing/exporting
Cloud integration: Syncs with personal Google Drive, Dropbox and OneDrive
Remarkable custom app: The device can import files through my.remarkable.com
Device limitation (for Device Management or Data Security)
The Operating system (a Linux OS) cannot be onboarded to Microsoft Device Management or Intune
The Operating system does not have browser to access the Microsoft authentication portal
Users accessing corporate data are limited to do it in 3 general ways (sending it to the device via email, via usb cable, or via syncing the files from their Personal online storage aka Personal Dropbox, OneDrive, Google Drive)
Though reMarkable tablet can open, view, and annotate password-protected PDFs. However, this feature is limited to basic password protection and does not extend to Microsoft Purview’s advanced encryption methods, such as Rights Management Services (RMS) or Microsoft Information Protection (MIP).
Impact Assessment
Users will encounter issues only when using sensitivity labels with encryption to PDF files. This limitation exists because the Remarkable devices cannot process Microsoft Purview’s advanced encryption methods, lacking both the necessary authentication capabilities and OS support to decrypt protected content.
The device also has no browser to authenticate with Microsoft services and its custom Linux-based OS (Codex) cannot be integrated with Microsoft’s security ecosystem. This makes it not possible to work on encrypted PDFs.
However, if PDF files are merely labelled without encryption applied (visual marking only), users will experience no impact whatsoever. These files remain fully accessible and maintain all annotation capabilities, as the labelling exists purely as metadata without affecting the file’s core accessibility.
Potential Solutions
Simple approach: Instruct executives to use sensitivity labels without encryption for PDF files they need to access on their Remarkable devices. Implement DLP monitoring to track PDFs sent to personal email addresses, providing security oversight without disrupting workflow.
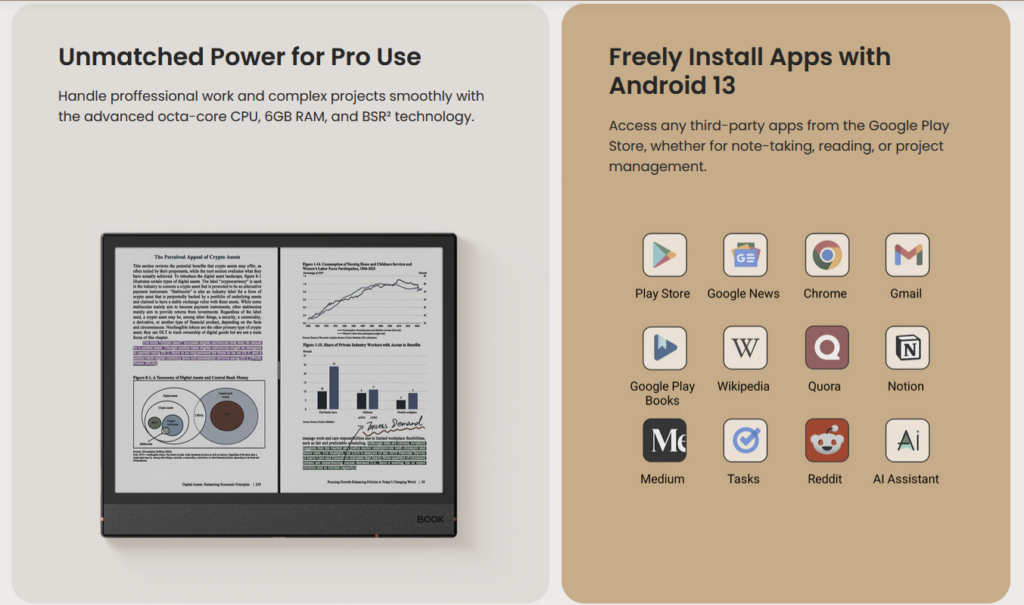
Moderate approach (but Costly): Issue corporate Onyx Boox eReaders as an alternative. Onyx Boox is a direct competitor of Remarkable but the key difference is that it runs on Android OS.
The big benefit: these Android-based (Android 13 OS) devices support Microsoft authentication and can be properly integrated with MDM solutions, allowing full compatibility with encrypted documents.
It also cost less than the Remarkable Paper Pro, but buying an extra corporate device (even at $499 USD) just for reading PDF files and note taking might not be taken well by your CFO.
Complex approach: Create a special sensitivity label variant without encryption specifically for executive use cases involving eReaders. This label would maintain visual markings and tracking capabilities while ensuring accessibility on the Remarkable device.
Supporting your current Remarkable device users today.
If supporting Remarkable devices for VIP users is necessary, focus on monitoring data flow rather than blocking device use.
Set up DLP policies that track document transfers to personal emails and cloud services used with Remarkable. Include:
Alerts when sensitive documents are transferred
Required business justification for transfers
Time limits on sensitive document access
Targeted security training for Remarkable users
Regular reviews of transferred documents
Clear audit logs of document movement (once reviews are done)
This approach balances users device preferences with security needs. Monitoring works better than banning devices that senior staff prefer to use.
Let’s cut to the chase – PDFs are everywhere in your organisation, and they’re housing your sensitive data. I’m talking about those finalised e-signed contracts, bank statements, and countless other critical documents. While we’re all busy protecting our Office files with fancy security measures, PDFs often slip through the cracks. But here’s the thing – they need the same level of classification and protection as your typical .docx or .xlsx files.
Here’s the different ways you could label PDF files and simple to follow deployment strategy to enable PDF data classification to your data.
Labeling PDFs: Three Approaches
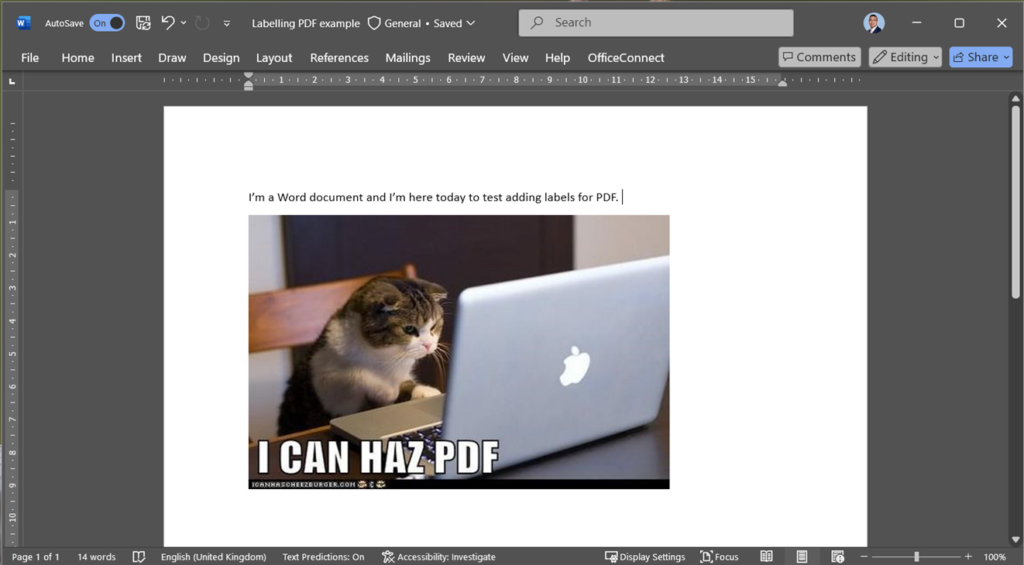
Label data natively in Microsoft Office then save it as PDF
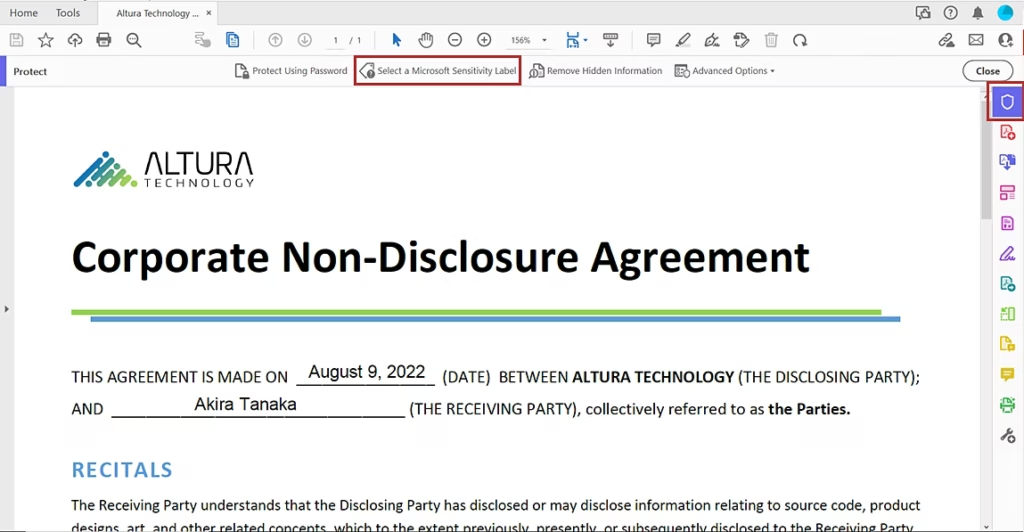
Label data using Adobe Acrobat
Label data using the Microsoft Purview In
Read all the way to the end to see what would happen if you use the “Open in PDF Word” function to an encrypted PDF file.
Approach 1: Label natively using Microsoft Office then save it as a PDF
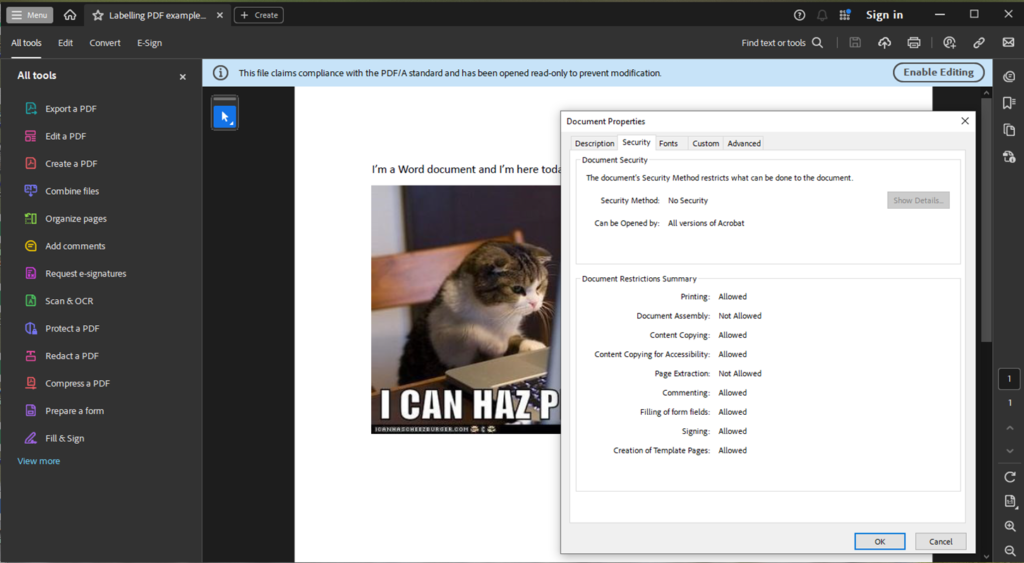
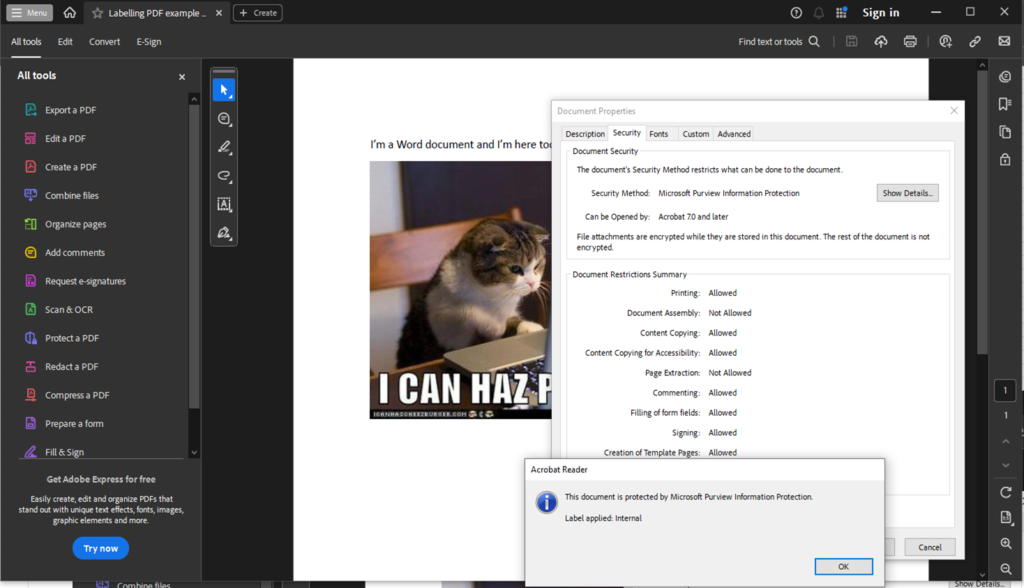
Approach 1: Label Then Save as PDF This approach is something you can do now. This method involves applying a sensitivity label directly to an Office document in an application like Microsoft Word, and then saving it as a PDF. Although the label transfers to the PDF, note that if your label incorporates encryption, you must disable the PDF/A option when saving. The resulting PDF will display protection via Purview Information Protection, and its custom properties will indicate the applied label.
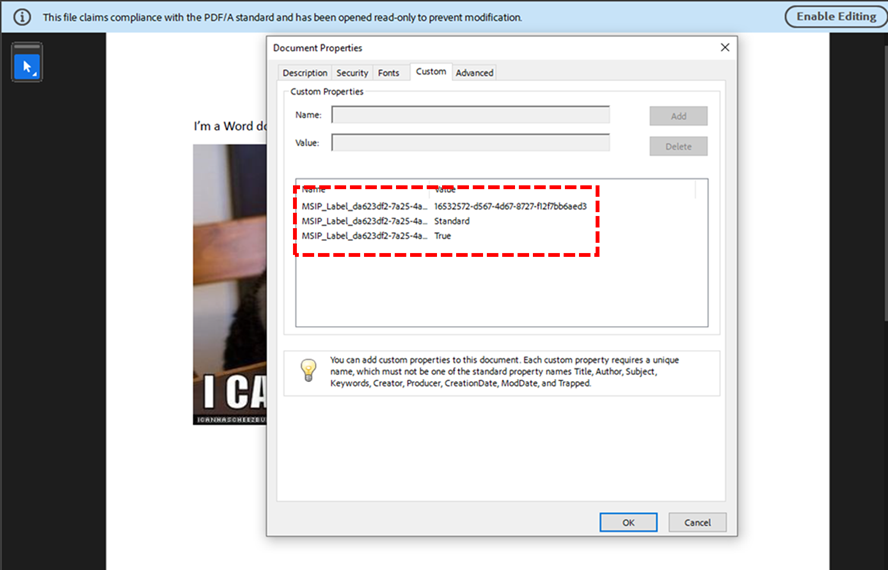
Created a New word documentSaved as a PDF. The document security shows no security as the label that I used is just a plain label without any encryption.Custom values shows the label that I used.
TAKE NOTE that if your label has ENCRYPTION turned on, then you need to unselect the PDF/A option as you save it.
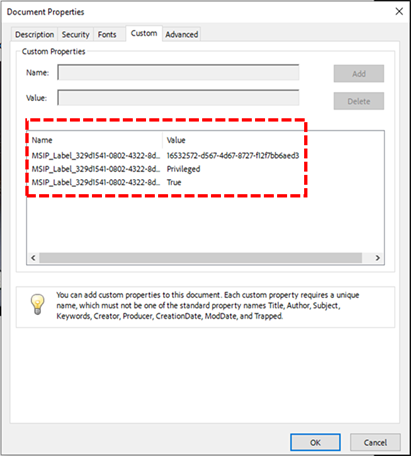
The security tab displays that it’s protected by Purview Information Protection.The custom properties shows the Privileged/ Protected / Encrypted label used
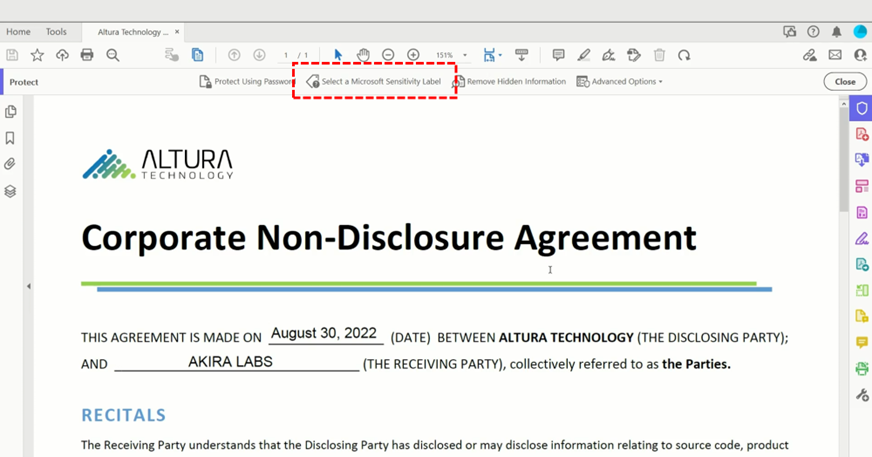
Approach 2: Label data using Adobe Acrobat PDF Reader
Here’s where it gets interesting (and a bit challenging). Most of us view these PDFs through web browsers or PDF readers, with Adobe being the undisputed king of the PDF world. In fact, Adobe’s so dominant that in most organisations I’ve worked with, it’s practically become the default way to handle PDFs – much like how we all say “Google it” instead of “search for it”.
Unlike your Microsoft Office suite (Word, Excel, PowerPoint, Outlook), Adobe Acrobat doesn’t play nicely with Sensitivity labels. The “solution”? Mucking about in the Windows registry. Yes, you read that right – registry editing. Adobe’s own support documentation lists down the exact steps to do this. Source (Adobe MPIP Support: https://helpx.adobe.com/enterprise/kb/mpip-support-acrobat.html)
Sure, tweaking the registry is not difficult to do. But imagine rolling this out across thousands of machines in your enterprise. Any experienced IT admin who’s attempted large-scale registry changes will tell you that it’s not fun.
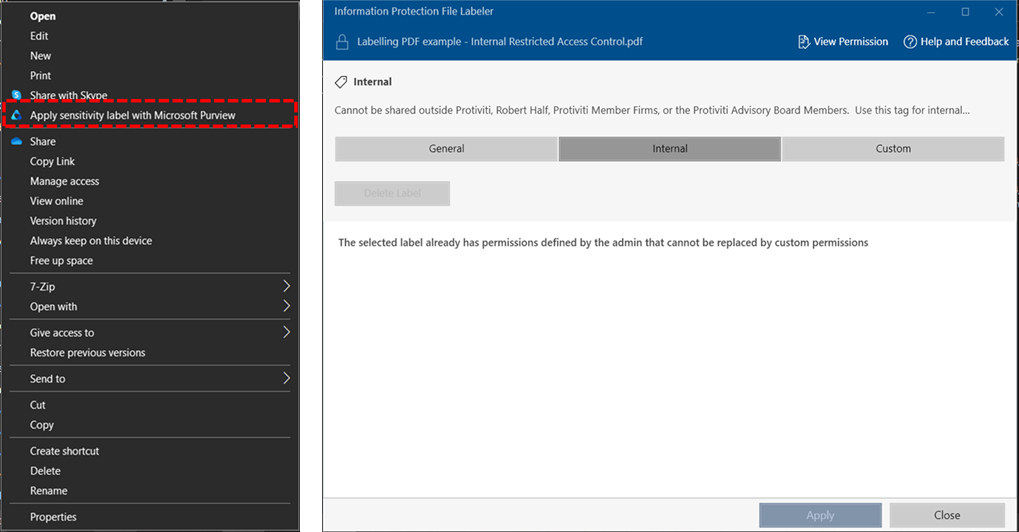
Once installed, you now have a tool that can label PDF files and do so much more. There are some limitation to this that you’ll see below. The client application can be launched by right clicking a file and selecting Apply sensitivity label with Microsoft Purview.
One big benefit of using this client is that you can select multiple files or even an entire folder and mass label them in 1 go. You can use this to MANUALLY label all the files sitting inside a PC or even in a Shared Network Drive.
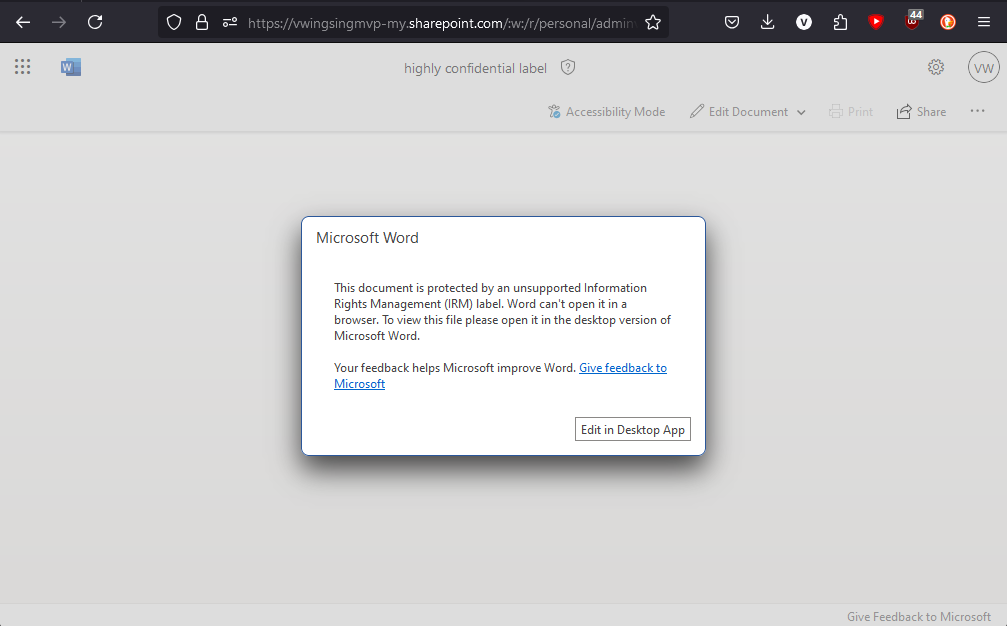
The short answer is that your data is still protected. Here’s what happens when I tried to open an encrypted PDF file in Word.
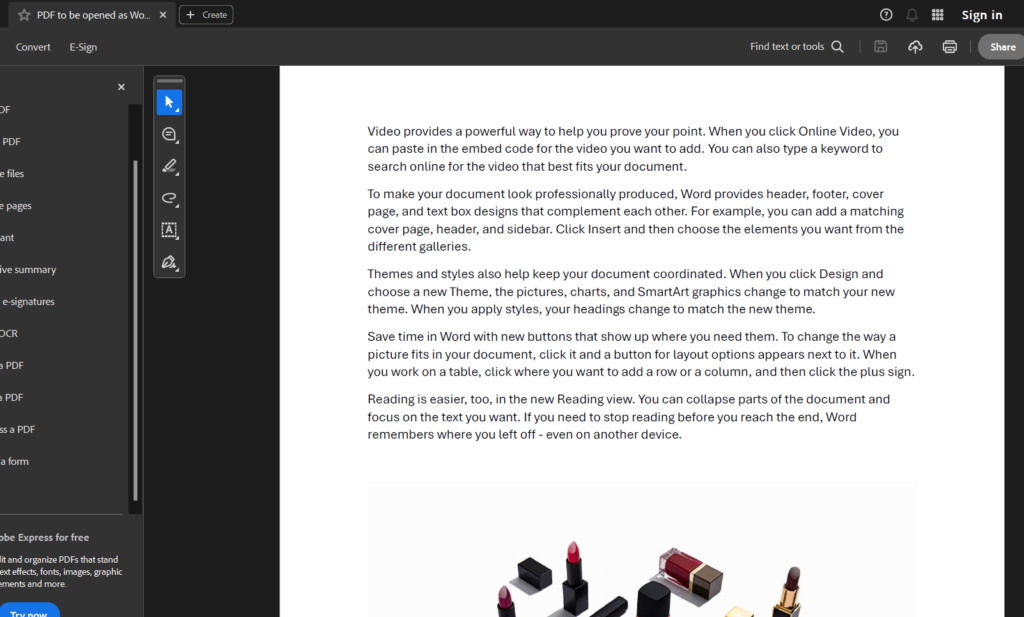
Here’s the original PDF file that I have encrypted.
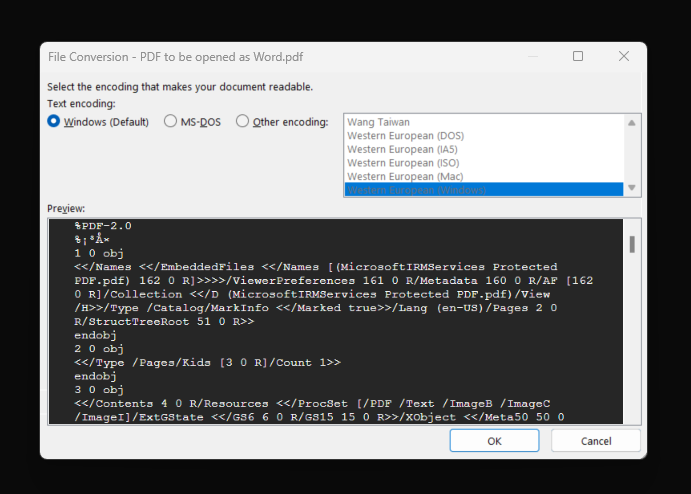
After using Word to open the PDF. A pop-up prompt asked me select how I want the file to be opened.
From the Preview window, I can already see that the data is encrypted by Microsoft IRM Services. This gives me confidence that the data is protected.
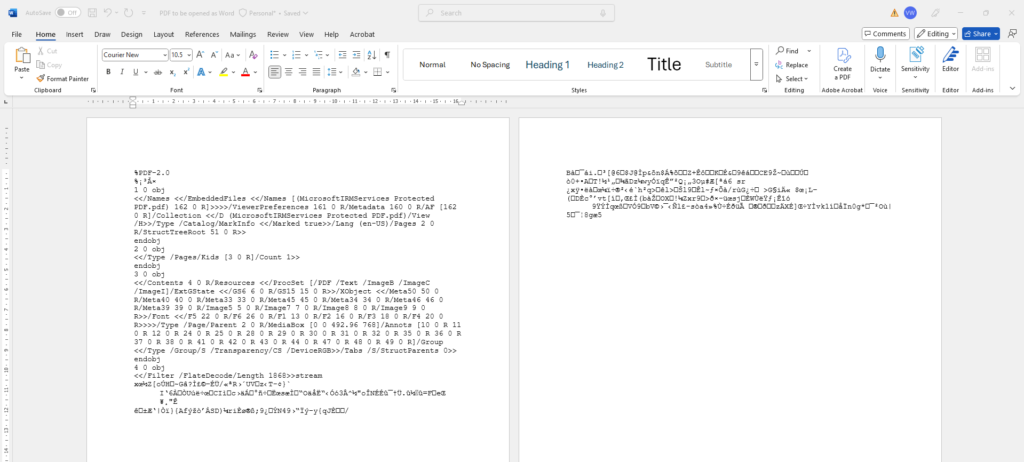
Then upon opening the file, all I can see are the hashed data. The text + image in the original file is no longer readable.
Deployment strategy
Now that you know how labels works for PDFs. Let’s talk about Deployment.
Begin with Approach 1 because it leverages familiar tools like Microsoft Word and allows you to secure sensitive PDFs right from the document creation stage. This straightforward step minimises the learning curve and reduces the likelihood of errors, enabling your team to adopt essential security measures immediately.
Once the basics are in place, invest in user education to ensure proper application and management of sensitivity labels. Training reinforces security compliance and builds a strong foundation, empowering your staff to understand and uphold data protection practices across the organisation.
After establishing confidence in Approach 1, transition to the Microsoft Purview Information Protection client (Approach 3) to enable scalable, mass labelling across devices and shared drives. This phased progression not only improves operational efficiency and consistency but also sets the stage for introducing more advanced options like registry adjustments (Approach 2) when additional formatting or watermark requirements arise.
I encountered a MIP labelling use case that I have not encountered before. The use case question is:
What happens to an email that inherits the higher label IF the inherited label has the encryption/ permission set as “Let users assigns permissions when they apply the label” (aka user defined label)
The answer: a whole lot of complication as you can see below.
Encryption in MIP
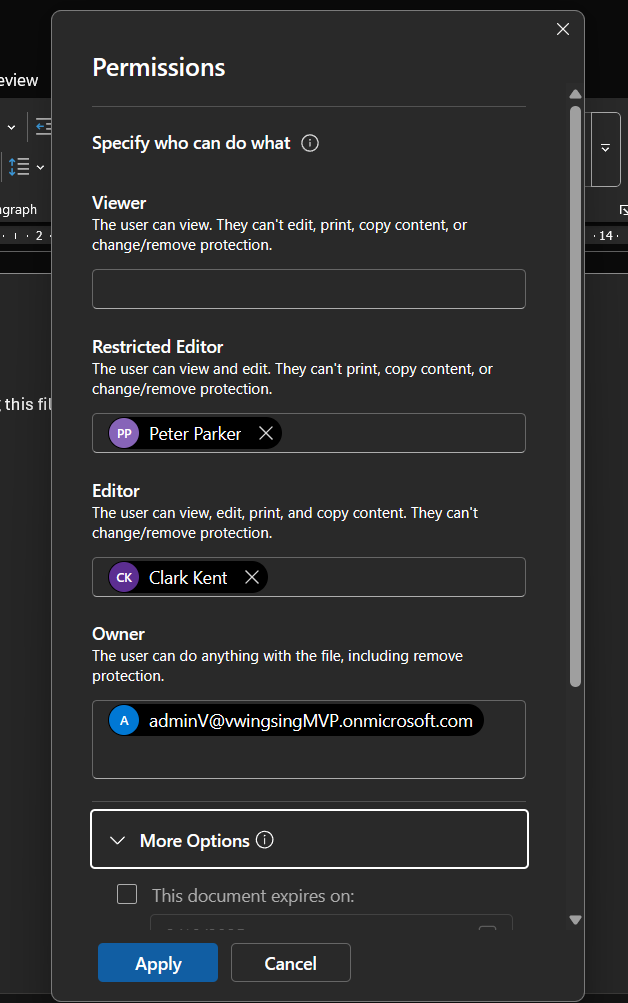
Starting with the basic of access control: Microsoft Purview Information Protection gives IT admin an option to select which type of permission model to choose. IT defined or User defined model. The User defined model enables end-users to be to define the encryption for their document. This can be done through the label itself under controls.
This gives the user the ability to mix and match how they want their data to be accessed. Users can select who can have read or view or edit rights. These can be different individuals in 1 permission.
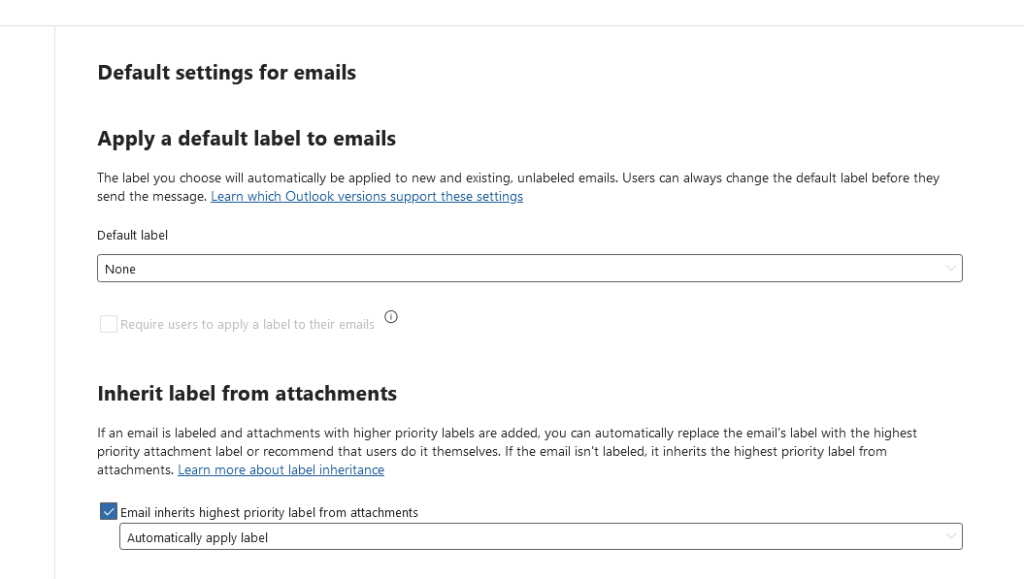
In the label publishing policy, you can then configure whether emails should inherit the label of a attachment if the label of the document is higher. This is to ensure that the higher label (with it’s higher security) takes precedence.
Testing
I ran a test with the following parameters.
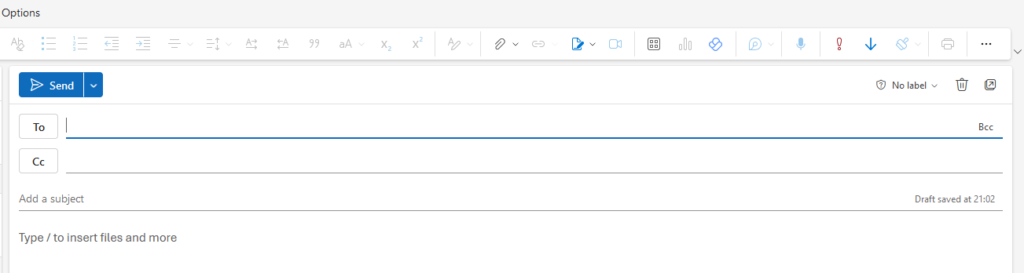
Open Outlook > The email label is set a NO LABEL
Attached the Word document I created earlier with the label called Highly Confidential (this is the same file with the permission set from the 2nd screenshot above)
Sent it to other 2 accounts that was not in the permission list above. This is to simulate how the recipients would see the message
Sent to 1 internal account (Barry Allen)
Sent to 1 external account that is NOT in the permission list
Outcome:
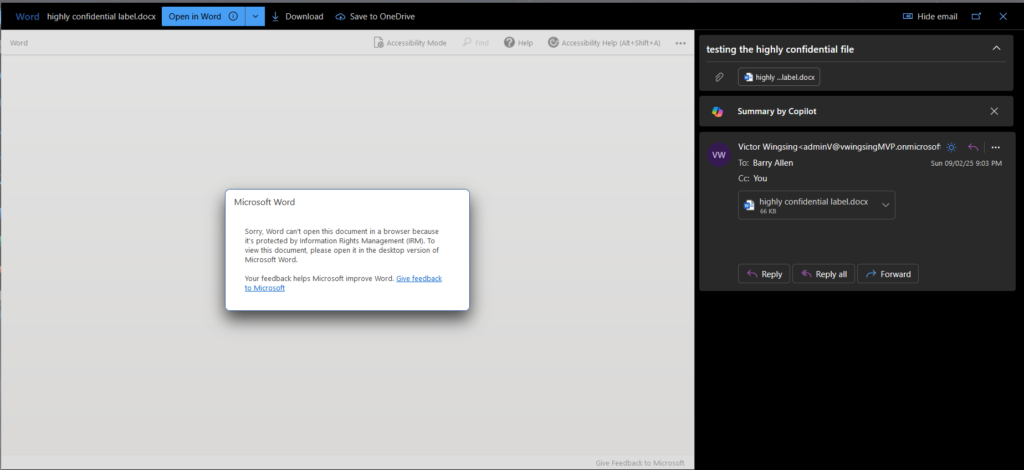
Outlook was NOT able to inherit the higher label.
On a positive note, this means that the encryption/ permission still works on the document. The screenshot above is from an external email that I have that was not in the permission list of the attached file. So IT security can at least have that peace of mind to know that as long as the data is properly labelled. Data leakage is kept to a minimal.
The IT defined encryption option
In another test where the encryption option model for the label that I used is set to use IT Admin defined (all permission is pre-defined.)
The Outlook email was able to properly inherit the label.
Advice to IT admins
The Value of Testing and Advice for IT Admins
Testing is essential when setting up MIP labels and encryption. Real-world testing helps uncover issues or behaviours that might not be obvious from the documentation. By testing it yourself, you can be confident that the setup works as expected in your environment and meets your organisation’s needs.
Advice for IT Admins: If you plan to use user-defined encryption, make sure your users are properly trained. This model can be confusing, and users might think they’ve set permissions correctly when they haven’t. To avoid mistakes, provide clear instructions and training. Testing these scenarios yourself will also help you spot potential problems and give better support to your users.
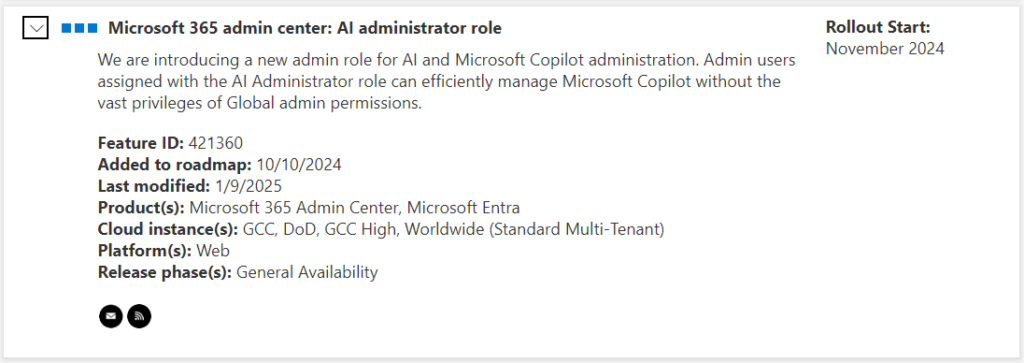
Microsoft has recognised the need for a specialised Admin account to manage AI and Microsoft Copilot across the organisation. This AI Admin role has started rolling out across all Microsoft 365 and Microsoft Entra clients since November 2024.
With AI Admin account can do the following tasks:
Manage all aspects of Microsoft 365 Copilot
Manage AI-related enterprise services, extensibility, and copilot agents from the Integrated apps page in the Microsoft 365 admin center
Approve and publish line-of-business copilot agents
Allow users to install an app or install an app for users in the organization if the app does not require permission
Read and configure Azure and Microsoft 365 service health dashboards
View usage reports, adoption insights, and organizational insight
Create and manage support tickets in Azure and the Microsoft 365 admin center
Among all Microsoft Purview security solutions, there’s one that you absolutely must get right. If you don’t, your entire data security strategy could fall apart, no matter what other security tools you’re using.
This key solution brings together three basic but crucial tasks: finding your sensitive data, labelling it correctly, and keeping it safe. This solution is Microsoft Purview Information Protection (MIP), and it’s at the heart of how you protect your company’s data.
Why is MIP so critical?
Think of the Microsoft Purview’s Data Classification service as the system that helps all other security tools know what to do. Here’s how it works with different Purview tools:
Purview Data Loss Prevention (DLP):
Works like a security guard that reads the labels
If it sees a file marked ‘Secret’, it knows exactly what protection rules to follow
For example: “This is confidential data, so don’t let it be shared outside the company”
Endpoint DLP (Devices) and Microsoft Defender for Cloud Apps:
These tools check the labels whether you’re working on your laptop or in cloud apps like Workday, Salesforce, etc.
They constantly ask “What’s this file’s label?” before allowing any action
Then they make sure the right safety measures are in place
Microsoft Purview Insider Risk Management:
This one’s particularly clever about using the labels
It watches for unusual behaviour with sensitive data
For example: If someone suddenly downloads 100 files marked ‘Highly Confidential’, it raises an alert
It can then start extra monitoring or take other protective steps”
Microsoft Purview Data Governance (Data Map)
This service uses MIP to help you map and catalog your structured data.
It gives you the ability to apply consistent classification across your data estate. You can have a standardised label across your organisation.
For example: “A ‘Confidential’ label means the same thing everywhere, making it easier to manage and protect”
Third party services using MIP
Even third party servicse leverages on the MIP data classification services.
Microsoft Purview Information Protection is the foundation that your entire data security and governance strategy builds upon. Without a properly planned and implemented MIP deployment, even the most sophisticated Purview solutions won’t deliver their full value. Think of it as building a house – you need to get the foundation right first.
As your organisation grows and your data landscape becomes more complex, your MIP strategy needs to evolve too. Regular reviews of your classification labels, updating sensitivity rules, and fine-tuning your protection policies aren’t just good practice – they’re essential for keeping your data secure and compliant.
I recently applied for a U.S. visa, and as part of the process, I had to submit my passport, bank records, and a lot of personally identifiable information to the embassy in the form of PDF and JPEG files. This meant that much of my sensitive data is now stored as images. This made me wonder: How are organisations safeguarding data that is image-based rather than text-based?
Traditional Data Loss Prevention (DLP) strategies, while effective in monitoring text-based data, often fall short when it comes to image-based content. This shortcoming can lead to significant vulnerabilities, as sensitive information is frequently embedded within images (see my example above). Optical Content Recognition ( OCR) emerges as a must-have tool in addressing this gap, enabling organisations to extract and analyze text from images. For Cyber Security teams aiming to enhance their data security posture, integrating OCR into their DLP strategy is not just beneficial—it is a must!
What are the industry use cases for OCR in DLP?
Financial services: Sensitive information such as account numbers, credit card details, and personally identifiable information (PII) is often embedded in scanned documents, receipts, and screenshots
Healthcare industry: There are data that are in the form of Medical records and scans, prescriptions and doctor’s notes (assuming that your doctor can write legibly)
Retail and Ecommerce: Scanned receipts and invoices and most product returns and refunds that starts in paper get scanned and stored.
Manufacturing: Contracts, Blueprints, R&D documents and even internal presentations (most of which gets converted to either an image or a PDF)
Government and Public Sector: Scanned copies of passports, drivers licenses and PII data, Incident reports (which again starts on paper and ends up as a image)
These are just examples of where OCR in DLP can come in to ensure that data is not leaked out.
OCR in Microsoft Purview
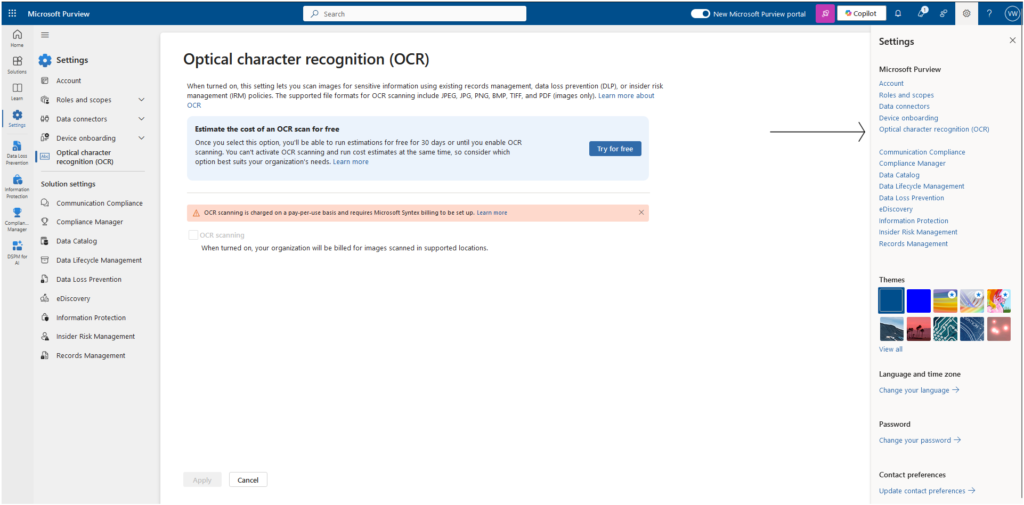
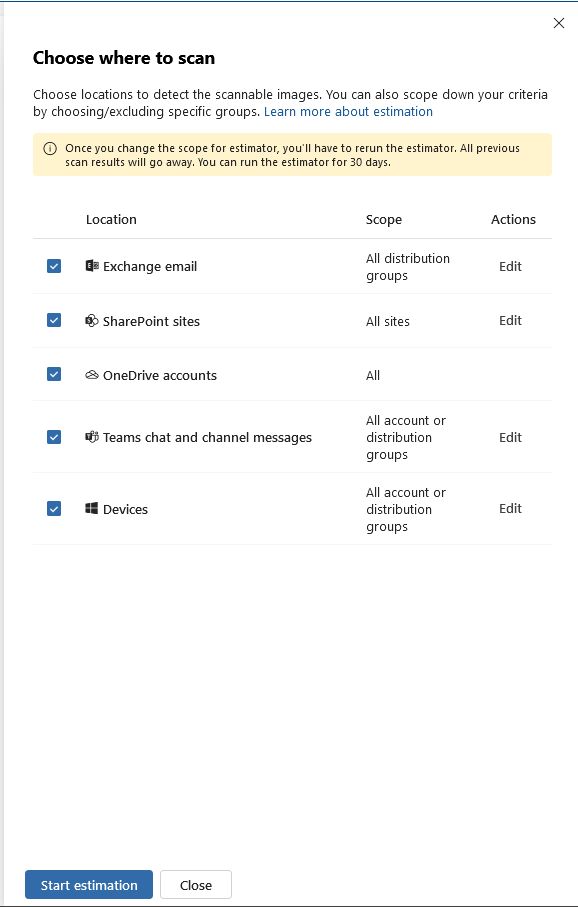
Microsoft Purview has OCR capability that allows you to be able to identify, and protect data. This allows you to scan images for Sensitive Information but do remember that this is an OPTIONAL feature and must be enabled at a Tenant level. There’s also a bit of a cost to it (more on this later)
To turn on OCR in your Microsoft Purview you’d need to do the following.
Go to Settings > Select Optical Content Recognition.
This capability is powerful as it leverages on the Azure AI to use OCR. As of today, the cost to run $1.00 USD per 1,000 scanned item. The keywords to look out for in the costing is ‘per scanned item’ this is because Microsoft considers each page in a PDF or each individual image page in a set of images as 1 scan. So a PDF that contains 10 pages counts as 10 scans. https://learn.microsoft.com/en-us/purview/ocr-learn-about?tabs=purview#estimate-your-ocr-scanning-charges
Data Strategy in using OCR for the first time.
To limit your cost and be more deliberate in running this OCR scan, here’s a helpful strategy so that you use to get started.
Data Search Using Content Search in Purview: Utilize Microsoft Purview’s Content Search feature to filter by file type, such as JPEG and PNG, to identify potential images containing sensitive information. This targeted approach ensures that all image files are scanned for embedded text.
Focus on Known Locations: Identify departments or teams that handle sensitive data, such as Finance, Sales, and Marketing, and focus OCR searches on their respective SharePoint sites. This strategy maximizes the efficiency of OCR by concentrating on areas where sensitive information is most likely to reside.
File Name Analysis: Implement keyword searches for terms that indicate sensitive content, such as “passport” or “ccn” (credit card number), in file names. This proactive approach helps in identifying and flagging files that may contain sensitive information.
My news feed is filled with “A Year in Review” of what happened in 2024 and the thing that stood out to me was 2024 was a bit of a mess for AI implementations.
From chat-bots giving illegal advice to fake content flooding our news and social media feeds (I’m pretty sure that I’m not the only ones who’ve seen the Pope wear a cool puffy jacket)
The rush to implement AI solutions was largely driven by market pressure and FOMO (Fear of Missing Out). Companies, desperate to stay competitive, rushed to deploy AI solutions without proper governance frameworks or security controls. Board rooms worldwide echoed with demands for “AI strategy,” often without understanding what that actually meant for their business.
This perfect storm was further fueled by the accessibility of AI tools and platforms. What used to require deep technical expertise became available through simple APIs and low-code interfaces. While this democratisation of AI is generally positive, it led to a “wild west” scenario where implementations often outpaced proper security and compliance considerations.
The result? Poor deployment, Terrible user experience and many half-baked AI solutions, security vulnerabilities, and trust issues.
Before You Start: The Boring (But Essential) Bits
Look, I get it – you want to jump straight into the exciting world of AI. But here’s the thing: you need to sort out your data house first. Think of it like baby-proofing your home. Your CISO and security team need to know exactly what data you’ve got, where it lives, and who’s allowed to play with it.
Get your Microsoft Purview DLP policies sorted, tag your sensitive stuff using Purview Information Protection, and make sure you’ve got the right security controls in place. Trust me, this boring bit will save you from some proper headaches later.
The Fix: Four Simple Actionable Steps
Sort Out Your Governance
Get an AI committee going
Write clear policies on AI usage, Data Protection, etc
Set proper standards
Actually check if things work (please audit!)
Lock Down Security
Content verification is your friend
Proper access controls (seriously)
Encrypt everything (not just email but the underlying data must be encrypted too)
Start small, scale later (even on a controlled Copilot for Microsoft 365, pilot it first with a handful of trusted people)
Train your people properly, (end-user education is a must)
Listen to user feedback
Don’t rush it
2024 showed us that rushing in without proper planning is a recipe for disaster. Take your time, do it right, and maybe we won’t see your company in next year’s “AI Fails” list.
I’m excited to share a practical guide I’ve created that walks you through the process of excluding specific users or groups from Microsoft Purview Sensitivity Labels. This guide comes from a real-world scenario where an organization is piloting a new approach to simplify its labeling structure. They wanted to test how reducing the number of labels applied to users would affect workflows and information protection. To support this, I’ve put together detailed instructions on how to effectively manage exclusions in Purview, along with a back-out process to ensure a smooth rollback if needed.
This PDF guide is packed with step-by-step instructions, screenshots, and expert tips to help you navigate the nuances of label exclusions. Whether you’re in the middle of a label simplification pilot or simply looking to better control label application, this guide will help streamline your process. Get ready to dive in and experience a more flexible, user-centered approach to managing Sensitivity Labels in Microsoft Purview!