In Part 1 (read it here), we established the strategic and collaborative foundations of Insider Risk Management.
Now, we move to the practical hands-on application of IRM: how to detect and investigate the specific patterns of insider risk using Microsoft Purview. This section is for those who are ready to implement these controls.
Let’s look at the 4 common patterns (plus an extra special one about AI) that most organisations sees their employees do when they try taking data out of the organisation…whether they are intentional about it or not.

The Departing Employee risk
People sometimes take client lists, pricing files, or other company information when they are about to leave because they think it will help them in their next job. They may want to keep customer relationships, prove their value to a new employer, or make their move to a competitor easier and faster. Some also tell themselves that the information is “theirs” because they worked on it or built those client relationships.
In other cases, the reason is fear or frustration. A departing employee may worry that once they leave, they will lose access to important contacts, documents, or knowledge, so they copy it “just in case.” Even if they do not see themselves as doing something serious, taking company data before leaving can expose the organisation to legal, commercial, and security risk.
Insider Prevention tip: Use HR connectors to flag resignations. Configure a policy that monitors for unusual collecting/sharing 90 days pre-departure.
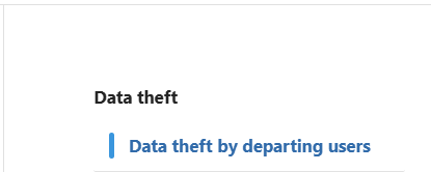
Inside Purview Insider Risk Management > Head to Policy then select the template Data theft by departing users. Then Select the HR connector configuration screen for Insider Risk Management. This is used to import resignation or employment status data for departing employee risk indicators.
Here’s the link on how to setup the connector: LINK
How to use these settings: Configure the HR connector to bring in employee status changes, such as resignations or planned departures. After the connector is active, map the relevant HR fields correctly and verify that departing users are being detected. You can then use this signal in an Insider Risk Management policy to increase scrutiny during the pre-departure window.
The Email to self risk
The “remote work” excuse – emailing sensitive attachments to their own personal accounts (Gmail, Outlook.com, etc).
Mitigate this by creating a policy for detecting emails with attachments sent to personal email accounts or other external recipients.
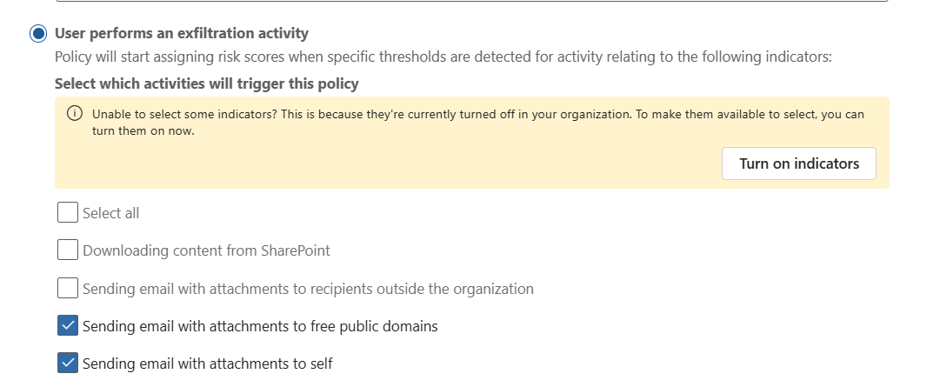
How to use these settings: Select indicators for email activity to external recipients and focus on messages that include attachments. If available in your configuration, narrow the scope to personal domains and combine the policy with sensitivity labels or priority content so that high-value data is reviewed first.
Implementation Tip: Detect emails with attachments to personal domains. Correlate this with sensitivity labels to prioritise high-value data.
The Drip transfer risk
There are users who try to be sneaky by diong small, repeated transfers over time that individually look benign but collectively represent a significant leak.
To mitigate this, set your threshold or sequence settings for repeated low-volume transfers to the same external recipient over time. You can even use the same policy as the Email to Self policy above.
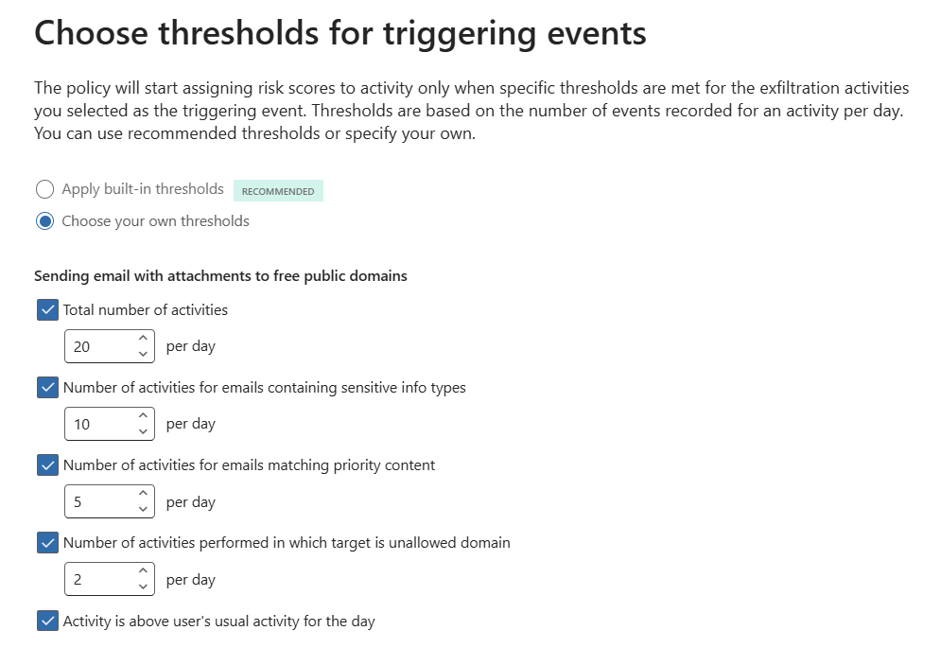
How to use these settings: Set thresholds that look for repeated actions rather than one large event, such as multiple small sends to the same recipient across several days. Tune the volume, frequency, and time window so the policy can identify slow exfiltration patterns without creating too many false positives.
Implementation Tip: Set thresholds for repeated sends to the same external recipient. Use volume-based triggers to catch this slow-and-steady exfiltration.
The “Detour” risk
This is when a user is blocked by DLP and immediately tries a workaround (e.g., downgrading a sensitivity label or using a personal device).
Modify your policy configuration to look for sequence of events where a user has experienced the following: DLP block events, sensitivity label downgrade signals, or related sequence detection settings for attempted workarounds.

How to use these settings: Configure the policy to look for a DLP block followed by a related action that suggests circumvention, such as a label downgrade or a second attempt through another route. The key is to use sequence-based detection so the system recognises the pattern of behaviour, not just a single isolated event.
Implementation Tip: Trigger on DLP blocks followed by label downgrades. This pattern is a strong indicator of intentional circumvention.
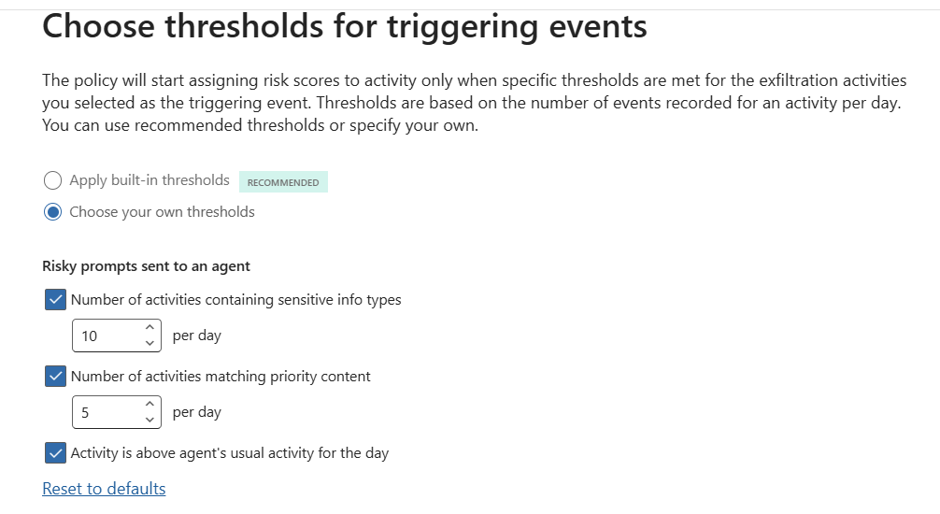
The Agentic AI risk
AI agents and copilots now act on behalf of users, accessing and moving data. 94% of organisations report AI is increasing insider risk. If your organisation does not have the basic data proctection control, there is a high-likelihood of data risk.
To mitigate this risk: Use both Purview Insider Risk Mnanagement and Purview Data Security Posture Managenent to create policies that specifically looks for risky AI usage.
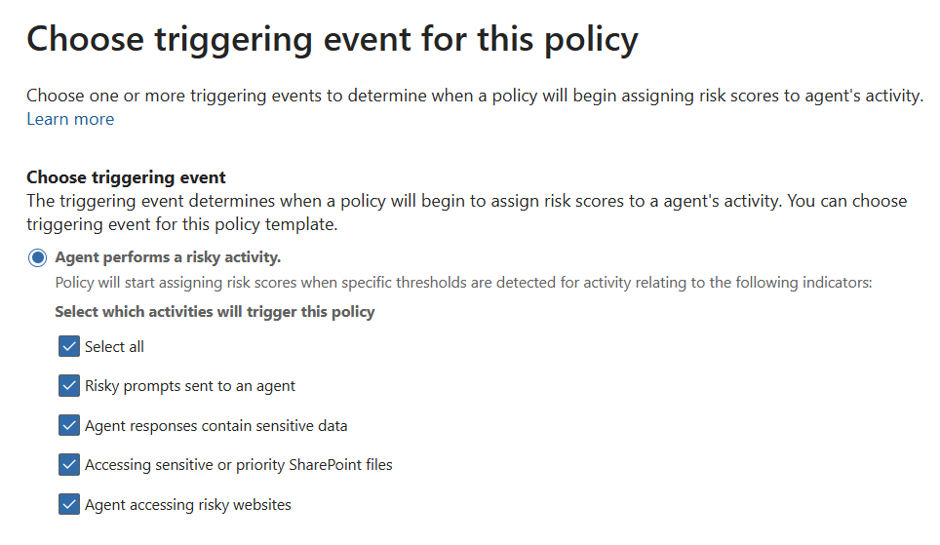
Similar to you basic policies, you can create thresholds to identify false positives to true positives.
Conclusion: Starting Small, Thinking Big
Don’t try to boil the ocean. Start with a pilot group (e.g., M&A or Finance). Insider Risk Management is a journey of cultural and technical maturity.
It’s about building a resilient organisation where data is respected, privacy is protected, and risk is managed collaboratively.